Store the unopened boxes in the room where the LVT fooring is to be installed for at least 48 hours before installation,
Always store the boxes on a flat and level surface,
Heating and air conditioning should be operational and set between 18 °C and 29 *C before, during and after installation,
Pemove thresholds and baseboards before you measure the room and calculate how much flooring to purchase,
Pemove the existing flooring to access to the subfloor if necessary,
Use a patching compound to fill in all cracks and holes in your subfloor to get a smooth, even subfloor surface,
Sweep the subfloor to make sure it is free from free of dust, stain and other contaminants,
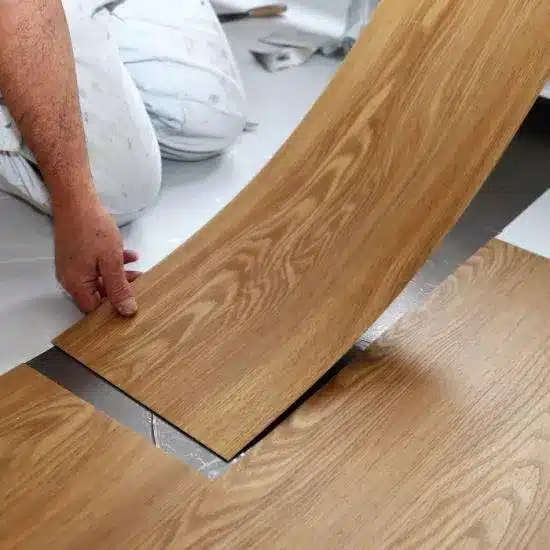
Self-Adhesive LVT Flooring - INSTALLATION
STEP 1
Use a tape ruler to measure the length and width of the room and determine the center of the room.
STEP 2
Snap chalk lines through the center of the room and divide the room into 4 equal sections.
STEP 3
Lay a row of LVT Flooring planks on the longest chalk line to see how they fit.
STEP 4
Flip the first plank over and grab the corner of the backing paper. Slowly peel the backing paper off of the first plank and throw it into the bin.
STEP 5
Flip the plank over and make sure the patterned side is face-up. Align the plank and make the plank flush against one of the corners where the chalk lines intersect.
STEP 6
Line up the short ends of planks and ensure the long edges are flush with one another. Press the second plank into place and continue to add more planks.
STEP 7
Measure the distance from the end of the last plank in the row to the wall. Cut the plank into the measured size. Install the cut plank on the end of the first row and make sure the cut edge is against the wall.
STEP 8
Move the first plank of your second row and make 1/2 or 1/3 of its length offset from the end of one of theplanks in your first row. Stagger the rows of planks, offset the ends of each planks to hide the seams better.
STEP 9
When the installation is finished, flatten the planks with a floor roller. Press the roller onto the planks and walk it across the length of the room to make sure planks are firmly adhered to the subfloor.
Dry Back LVT Flooring - INSTALLATION
STEP 1
Measure the length and width of the room accurately and calculate an even distribution of the first and last rows. Then draw a starting line on the floor with a chalk line.
STEP 2
Spread the adhesive along the starting line. Use the correct opening time and processing time. Place the planks exactly along the perfectly straight starting line.
STEP 3
Starting from one side of the straight line, press the planks onto the floor. Moving towards the other side of the wall and continuing to add more planks.
STEP 4
Measure the distance from the end of the last plank in the row to the wall. Cut the plank into the measured size, Lay the cut part, and make sure the cut edge is against the wall.
STEP 5
For a natural look, we recommend that the piece left over from the first row should not be used as the first piece of the second row to avoid creating a kind of staircase effect.
STEP 6
For the second and every subsequent row, make sure to stagger the end joints a minimum of 30cm apart from the previous row.
STEP 7
Place the second row and each subsequent row, and make sure there are no gaps between the planks.
STEP 8
Cut the last row along the wall or any obstacle with a utility knife. Remove any adhesive residues on the surface of the floor.
STEP 9
When the installation is finished, use a floor roller to ensure all the planks are firmly bonded to the floor.
Loose Lay LVT Flooring - INSTALLATION
STEP 1
Accurately measure the length and width of the room and calculate the even distribution for the first and last rows. Then, draw a starting line on the floor with chalk.
STEP 2
Moving towards the other side of the wall and continuing to add more planks.
STEP 3
Line up the short ends of planks and ensure the long edges are flush with one another. Press the second plank into place and continue to add more planks.
STEP 4
There are no gaps between the planks. Place the second and each subsequent row and make sure.
STEP 5
Repeat this process until you reach the edge row. Mark a line to determine the appropriate width of the flooring and cut it to fit tightly. When installing the edge row, cut the width according to the remaining space and install it.
STEP 6
When the installation is finished, use a floor roller to ensure all the planks are firmly bonded to the floor.